
Wiring Multiple Batteries
NOTE |
|---|
|
NOTE |
|---|
In a multiple battery installation with the conduit box, depending on the requirements in your area, you may have to connect conduit between each conduit box for the battery cables (required in the US and in Canada). |
Conduit in Two and Three-Battery Systems
On the battery, unscrew the battery terminal cover plates to access the positive battery terminals.
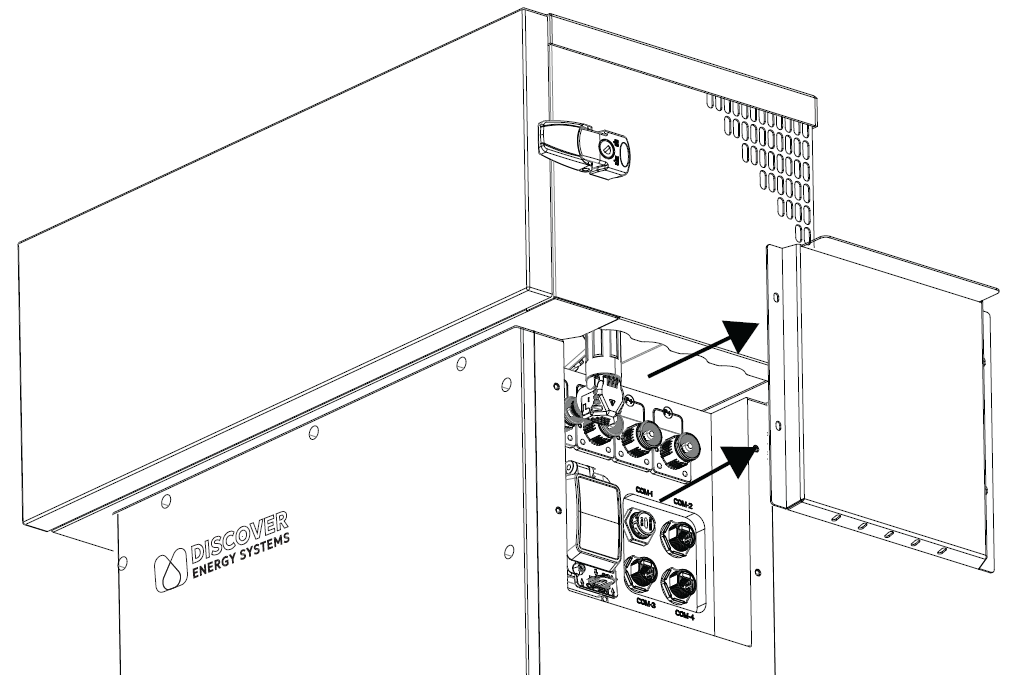
Remove Battery Terminal Cover Plate
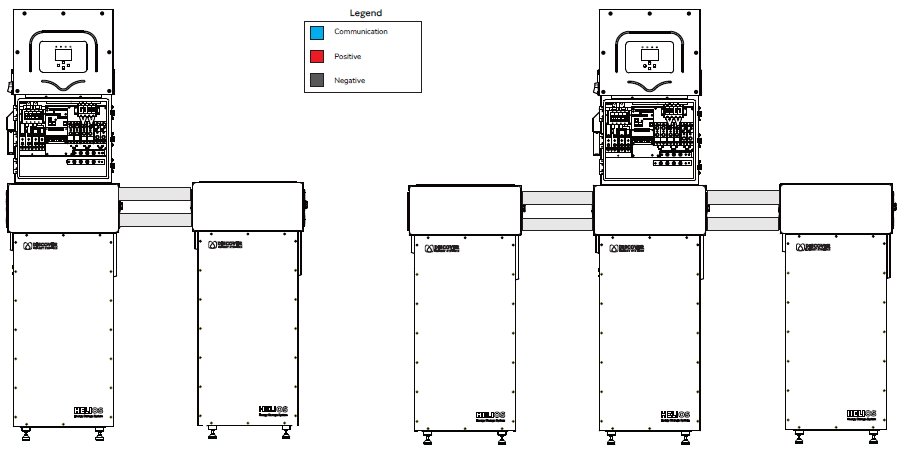
Pass the two positive battery cables in the HELIOS ESS Battery to Inverter Power Cable set (950-0070), from the inverter, through the conduit box, and out the conduit to the sides of the conduit box, as required.
Connect one of these positive battery cables to a battery on one end of the battery bank, and connect the other positive battery cable to the battery on the other end of the battery bank. Push the cable connectors against the receiving pins of the batteries to secure the connections.
Connect the lugs of these positive battery cables to the inverter’s positive battery ports.
Positive Battery Cables to Batteries at Opposite Ends
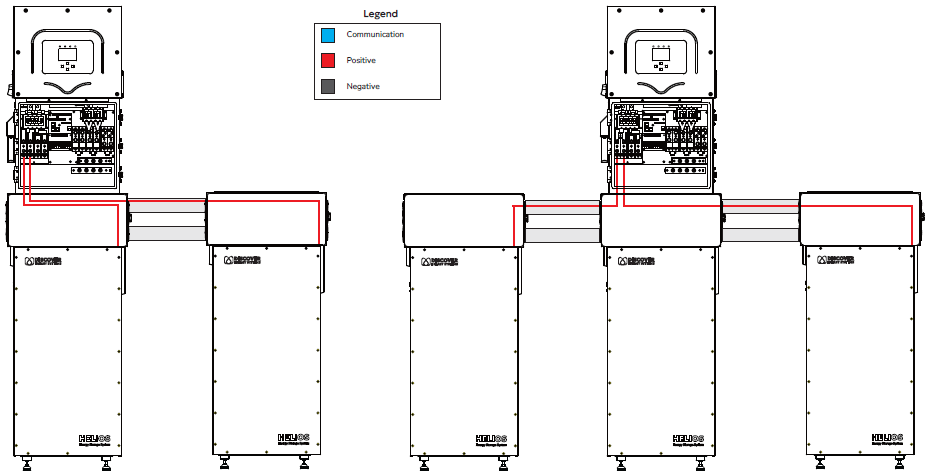
Repeat steps 1 to 4 to connect the negative battery cables (950-0070) to the negative battery ports on the inverter and to the negative terminals on the batteries at opposite ends of the battery bank. Push the cable connectors against the receiving pins of the batteries to secure the connections.
Connect the lugs of these negative battery cables to the inverter’s negative battery ports.

Negative Battery Cables to Batteries at Opposite Ends
Connect the positive battery cable in the HELIOS ESS Parallel Wire Kit (950-0068) to the receiving pins of the positive battery terminals as shown in the following diagrams. Similarly, connect the negative battery cable to the receiving pins of the negative battery terminals as shown in the following diagrams. Push the cable connectors against the receiving pins of the batteries to secure the connections.
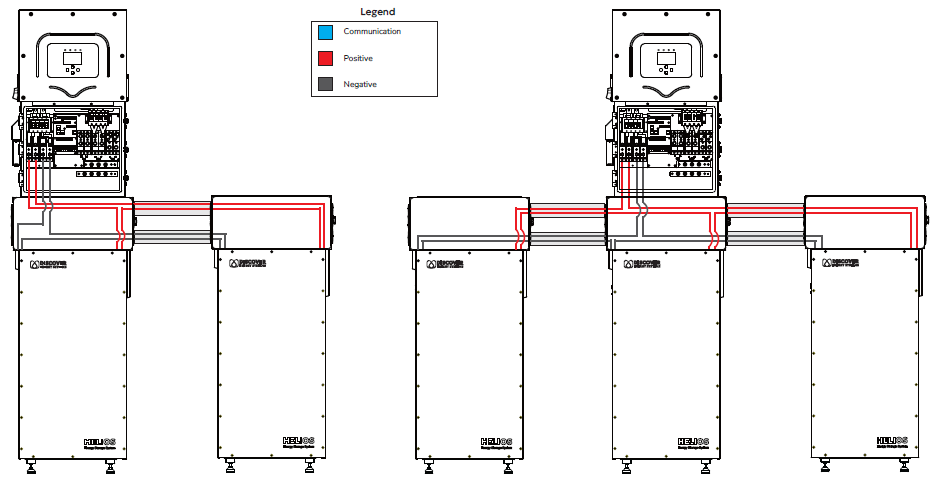
Parallel Battery Cables: Positive to Positive, Negative to Negative
After all the battery cables are connected, connect the CAN communication cables. (See the next section.)