
|
|
|---|
|
HEAVY OBJECT Two-person or three-person lift is recommended for the battery. Failure to follow these instructions may result in injury. |
The following instructions are based on installing the battery onto a wall. Instructions on installing the inverter itself are provided in the inverter manufacturer’s documentation.
-
Use a stud finder to locate the wall studs.
Identify a location that optimizes usability and support for the inverter and battery. The battery’s Wall-Mount Bracket requires at least 4 bolts supported by wall studs. -
Attach the rope handles to the battery and using a two/three-person lift, move the battery to the installation location.
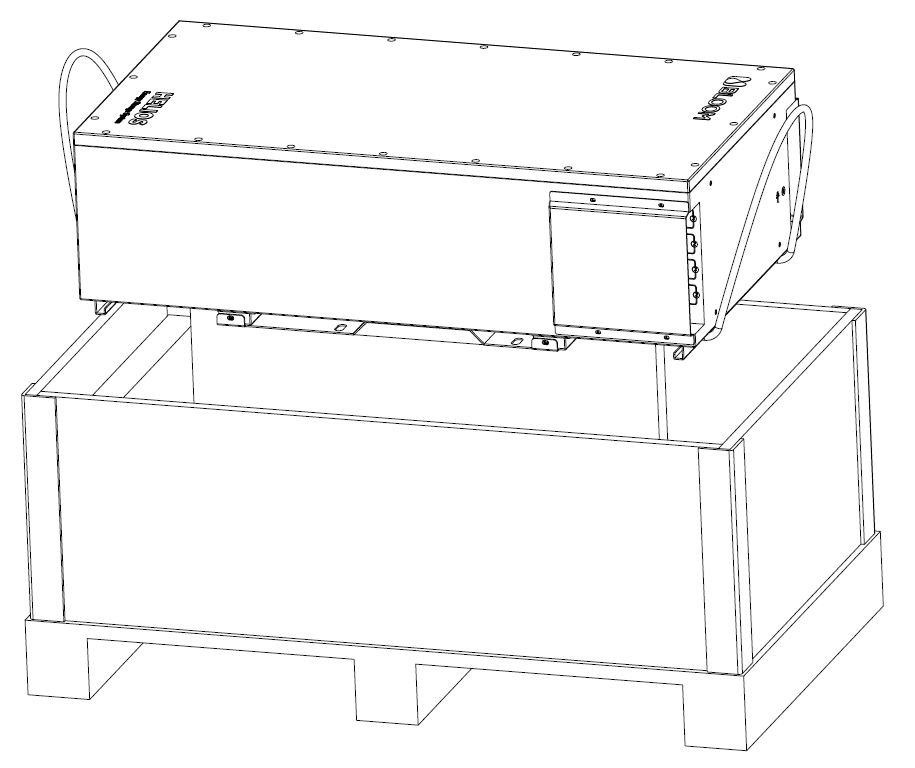
Use rope handles to lift the battery
-
Remove the screws affixing the Wall-Mount Bracket to the battery. Put the screws aside in a safe location.
-
If installing the battery off the ground and if the wall studs are not in ideal locations, consider adding appropriate structural supports to spread the weight of the 136 kg (299.83 lb) battery.
-
Use the dimensions in the following diagram to mark the location of holes for the HELIOS ESS battery Wall-Mount Bracket. Verify the holes are level. The drill hole heights are based on the feet being at their mid-point, allowing for minor height adjustments up and down.
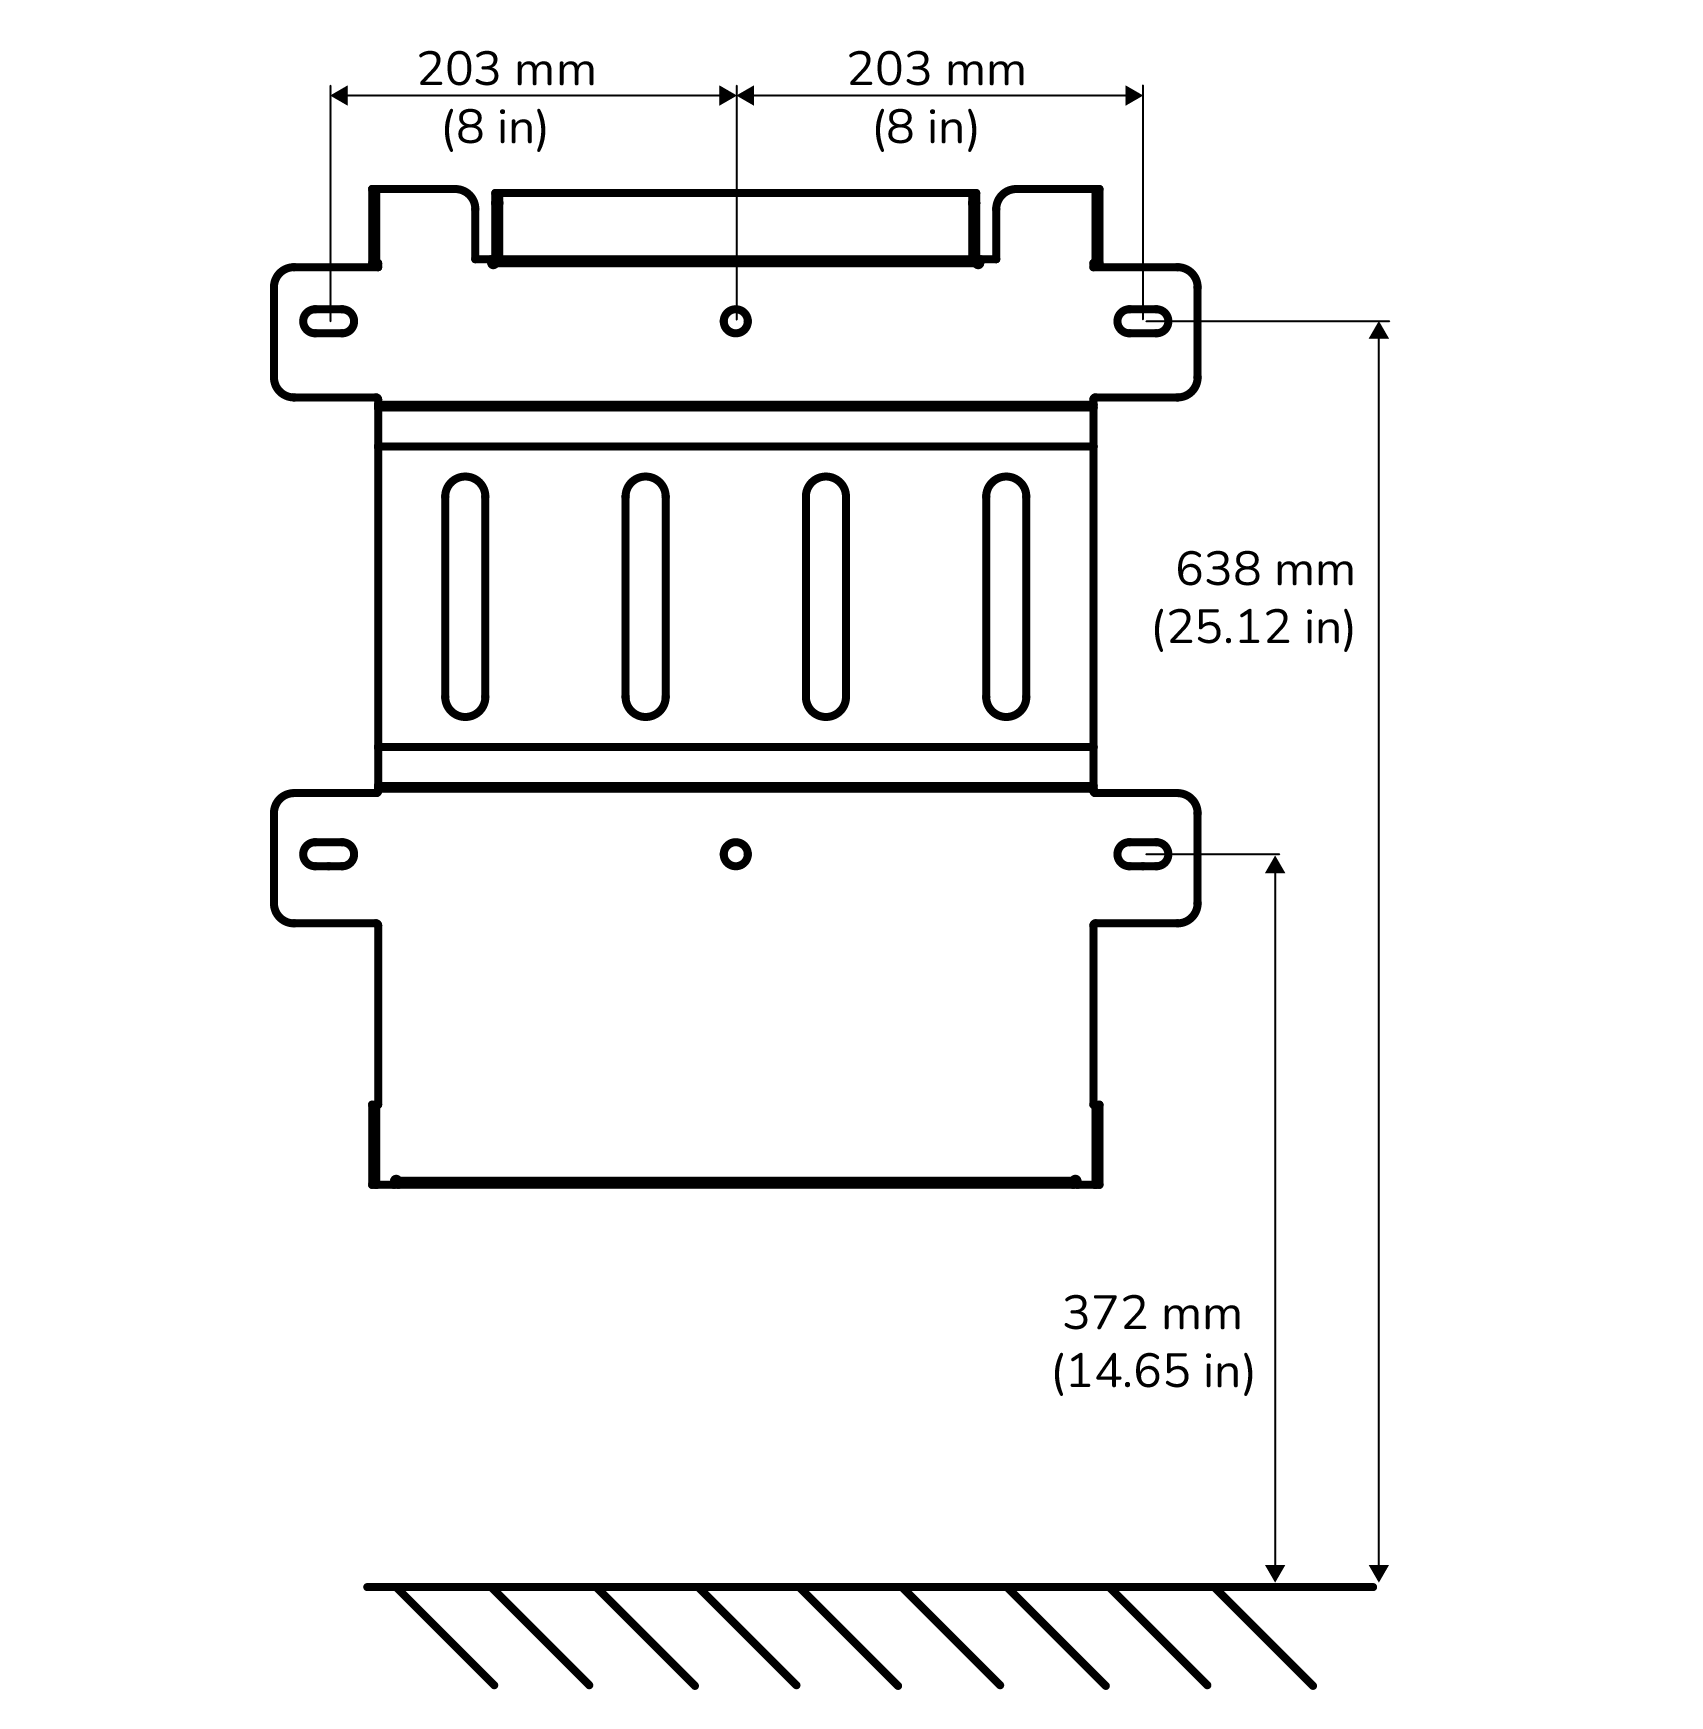
Wall-Mount Bracket Drill Holes (height of battery feet are adjustable)
-
Drill the holes for the Wall-Mount Bracket.
-
Secure the Wall-Mount Bracket to the wall using appropriate fasteners that can support the battery’s weight and are compatible with the material of the wall or studs. Use the torque recommended by the manufacturer of the fasteners.
-
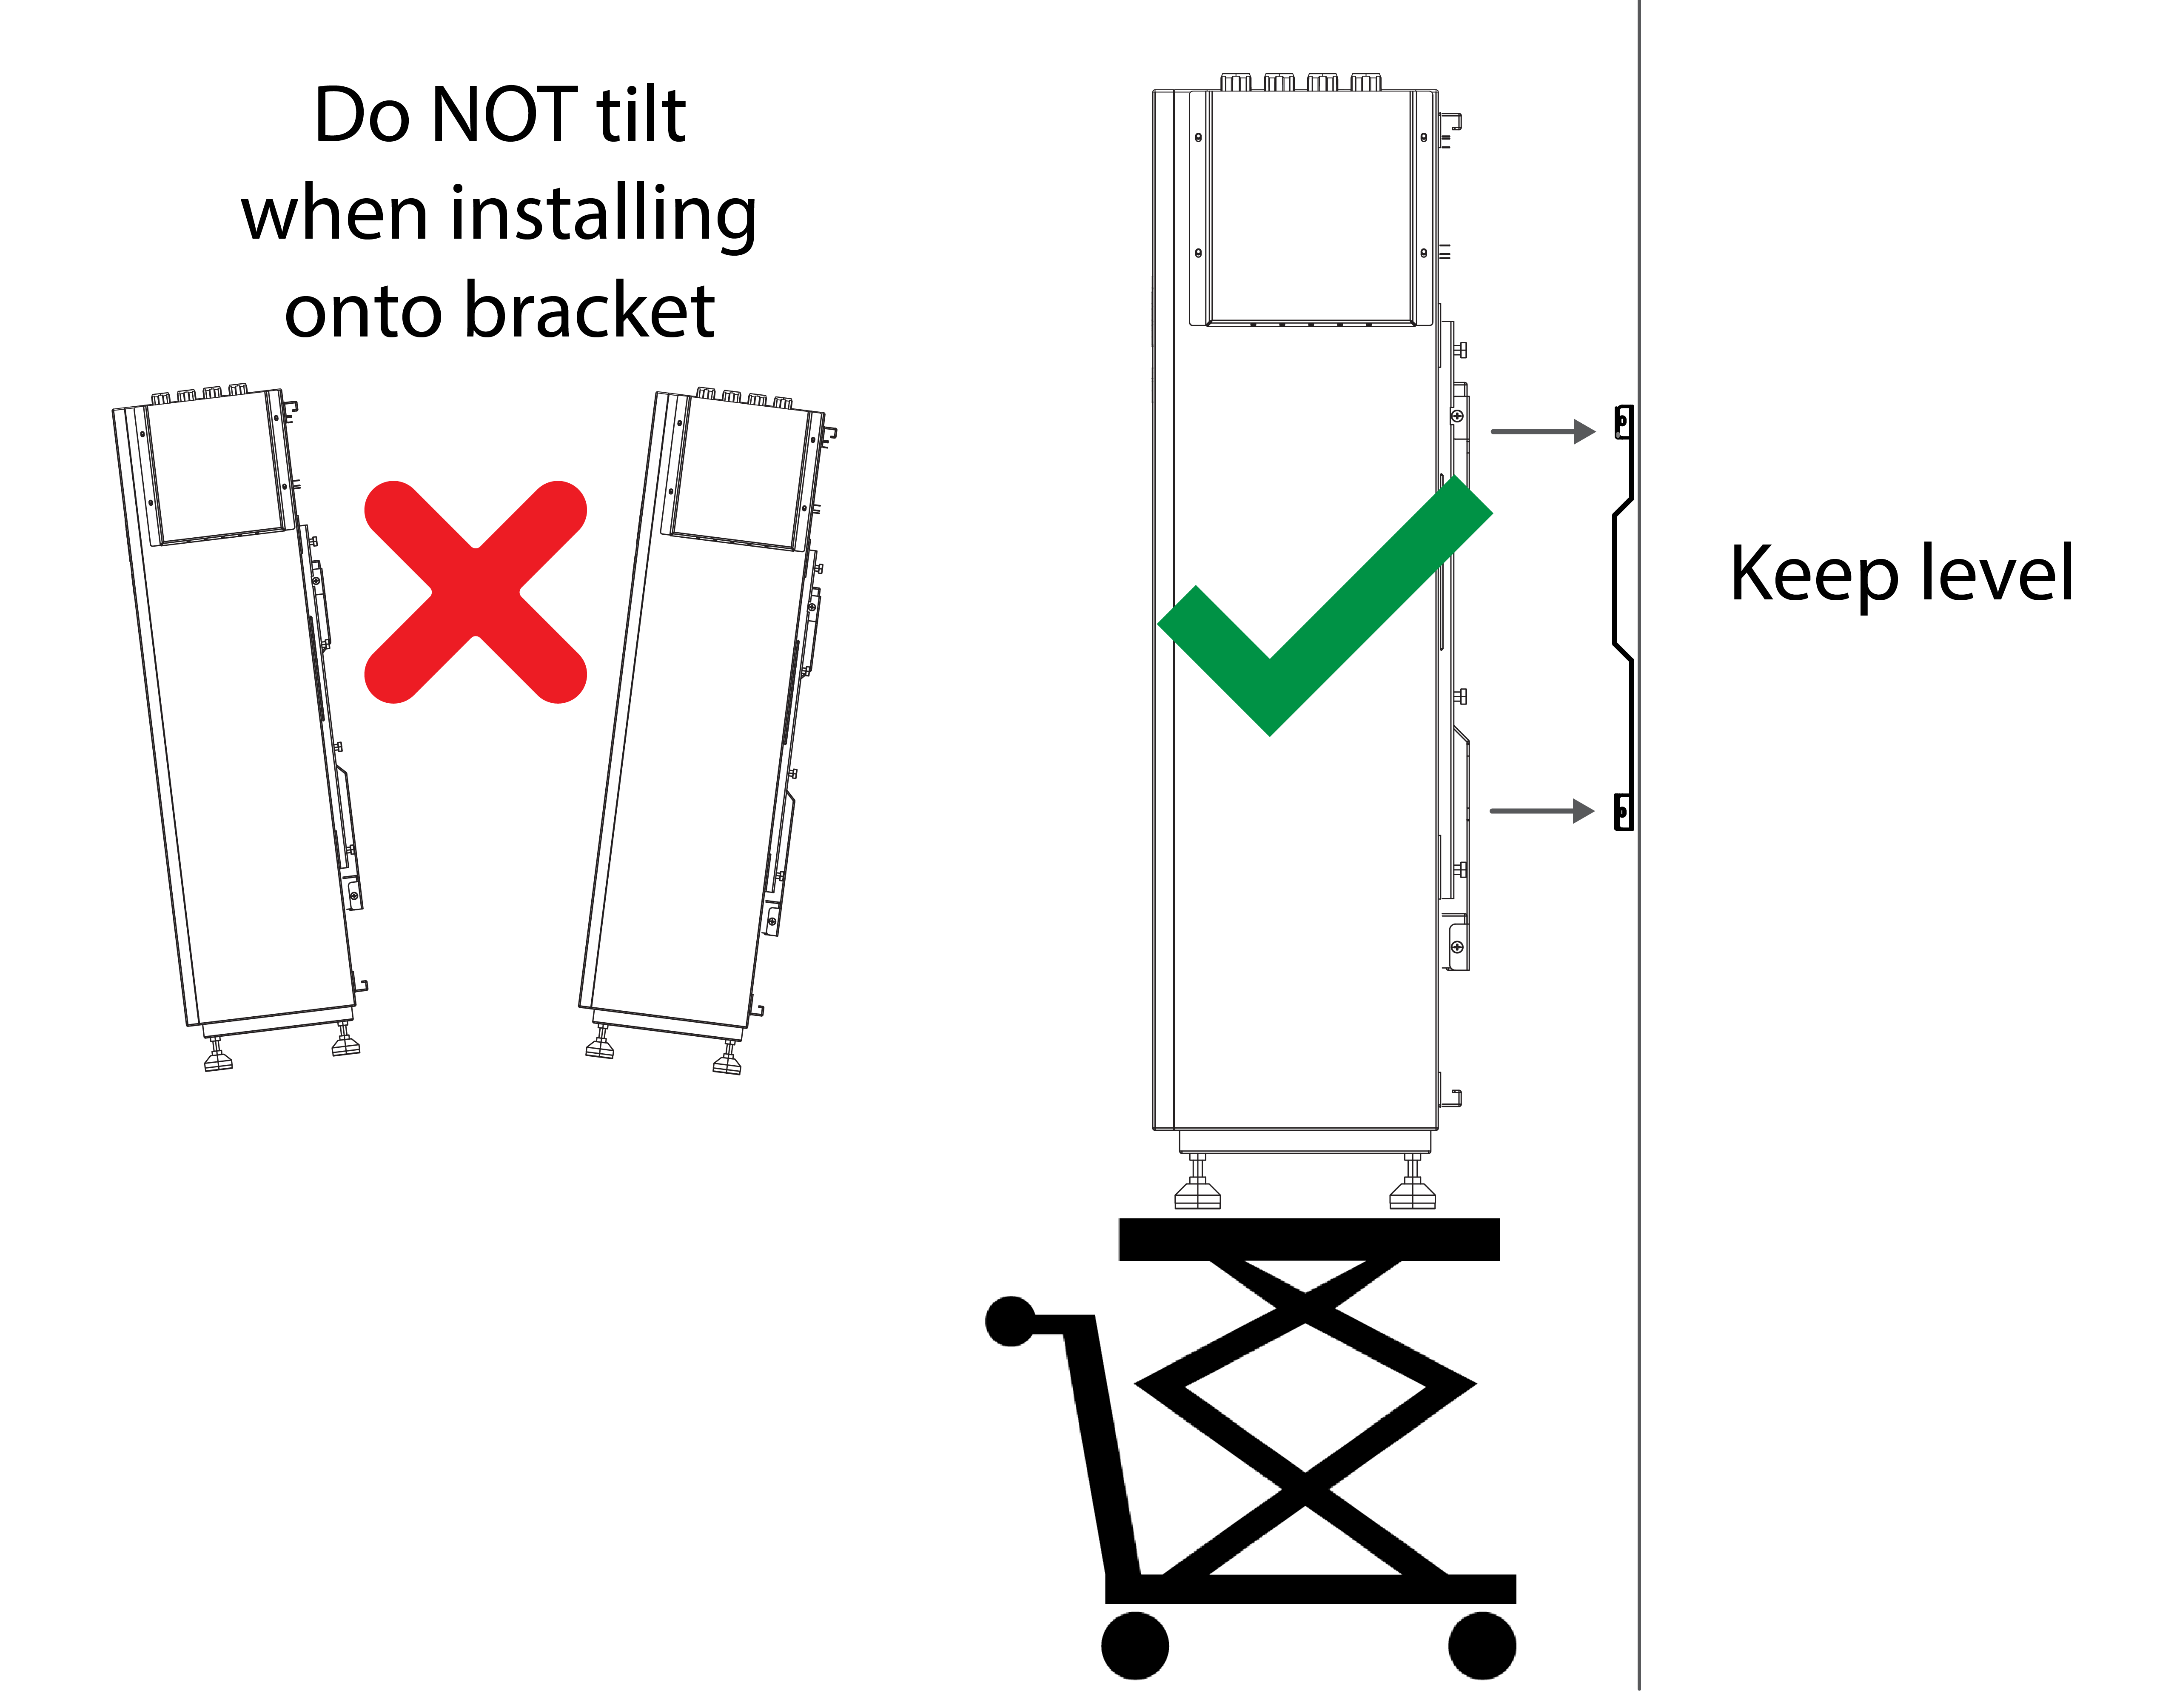
Attach the HELIOS ESS battery to the Wall-Mount Bracket.
-
Using a two or three-person lift, the battery lifting handles (950-0069), hydraulic lift, or other industrial equipment, lift and hook the battery onto the top and bottom slots of the Wall-Mount Bracket.
-
|
NOTICE |
|---|
|
WALL BRACKET DAMAGE
Failure to follow these instructions may result in equipment damage. |
b. From the right and left sides, secure the battery to the Wall-Mount Bracket with the screws that you put aside in step 3. Use a torque of 6 to 6.5 Nm (4.4 to 4.8 ft-lb).
c. Adjust the height of the HELIOS ESS battery’s feet so they press firmly on the ground.
-
Install the inverter (load or similar) near the battery. Refer to its associated manual for instructions.
-
Next, wire the batteries, load, and disconnect.
|
NOTE |
|---|
|
The cover plate protecting the battery terminals and COM ports is installed inside out for shipping purposes. Please keep this in mind when re-attaching the cover plate after wiring the battery and communication cables. |